Support our educational content for free when you purchase through links on our site. Learn more
What Is a Checklist for Event Planning? ✅

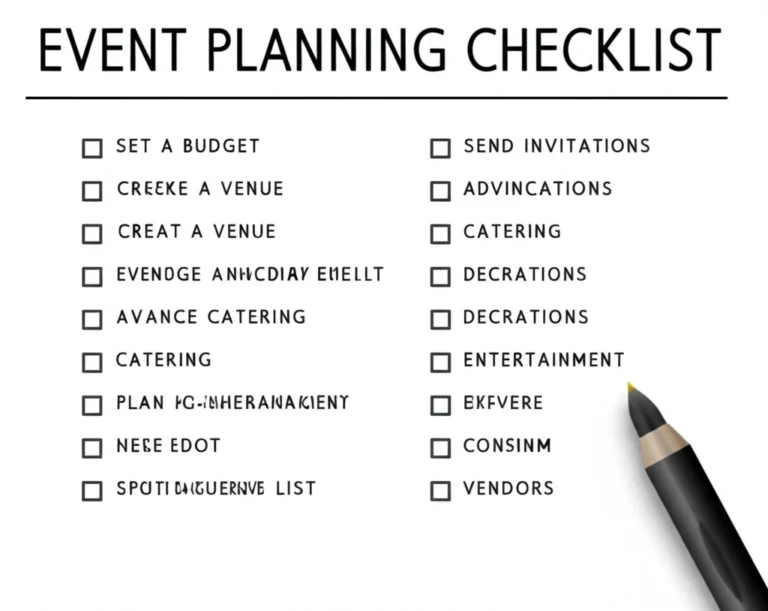
What is a checklist for event planning? It’s a practical, shared list of event tasks, deadlines, and owners that helps you plan everything from the first idea to the final cleanup. Our recommendation: start with one master checklist, then tailor it to your event, budget, venue, and guests.
We’ve seen a celebration’s big decisions fall neatly into place, only for a delivery entrance to be locked when the décor arrived. That’s why a useful checklist covers more than the headline items: it tracks logistics, accessibility, vendor details, backup plans, and who’s responsible for each task.
Key Takeaways
- A strong event planning checklist names the task, owner, deadline, and status.
- Adapt the checklist to your event. A birthday party, conference, fundraiser, and hybrid event have different needs.
- Plan from the event date backward to set realistic deadlines for booking, invitations, vendors, and final confirmations.
- Include guest experience, accessibility, safety, and contingency plans alongside budget, venue, food, and entertainment.
- Keep one up-to-date source of truth and review it with your team before event day.
- Close out after the event: settle outstanding details, gather feedback, and record lessons for next time.
Table of Contents
- ⚡️ Quick Tips and Facts for Event Planning
- 🗓️ What Is an Event Planning Checklist?
- 📜 How Event Planning Checklists Keep Every Detail on Track
- 🎯 Choose the Right Checklist for Your Event
- Corporate Events and Conferences
- Weddings, Parties, and Social Gatherings
- Fundraisers, Community Events, and Festivals
- Virtual and Hybrid Events
- ✅ The Complete Event Planning Checklist: 20 Steps from Idea to Wrap-Up
- 1. Define the Event Purpose, Goals, and Success Measures
- 2. Identify Your Audience and Estimate Attendance
- 3. Set the Event Date, Time, and Planning Timeline
- 4. Build an Event Budget and Track Expenses
- 5. Select and Book an Accessible Venue
- 6. Check Permits, Insurance, Contracts, and Event Rules
- 7. Create the Event Team, Roles, and Approval Process
- 8. Choose Vendors and Coordinate Venue Partners
- 9. Plan the Program, Run of Show, and Event Protocol
- 10. Book Speakers, Hosts, Performers, and Special Guests
- 11. Arrange Catering, Refreshments, and Dietary Needs
- 12. Plan Event Design, Décor, Signage, and Branding
- 13. Organize Audio-Visual Equipment and Event Technology
- 14. Make the Event Accessible, Safe, and Inclusive
- 15. Set Up Registration, Invitations, and Guest Communications
- 16. Promote the Event and Manage Marketing
- 17. Order Supplies, Printed Materials, and Giveaways
- 18. Confirm Final Details and Prepare Contingency Plans
- 19. Manage Event-Day Setup, Check-In, and Troubleshooting
- 20. Close Out, Evaluate Results, and Follow Up
- ⏳ Event Planning Timeline: What to Do and When
- Six Months or More Before the Event
- Three to Six Months Before the Event
- One to Three Months Before the Event
- Two to Four Weeks Before the Event
- The Final Week and Day Before the Event
- Event Day
- The First Week After the Event
- 💰 Event Budget Checklist: Costs, Tracking, and Contingencies
- 📍 Venue Selection Checklist: Layout, Access, and Logistics
- 🛡️ Event Safety, Emergency Planning, and Risk Management
- ♿ Accessibility and Inclusive Event Planning
- 🌿 Sustainable Event Planning and Waste Reduction
- 📱 Virtual and Hybrid Event Technology Checklist
- 🧰 Event-Day Essentials: Documents, Supplies, and Backup Plans
- 📊 After the Event: Feedback, Reporting, and Vendor Closeout
- 💡 Quick Event Planning Tips and Common Mistakes to Avoid
- 🔗 Recommended Links
- ❓ FAQ
- What should an event planning checklist include?
- How far in advance should you start planning an event?
- What is the most important part of event planning?
- How do you create an event budget?
- What should you do the day before an event?
- How do you plan an event with a small budget?
- What is the difference between an event checklist and a run of show?
- 📚 Reference Links
⚡️ Quick Tips and Facts for Event Planning
An event planning checklist is your working map from the first “What if?” to the last box of leftover cupcakes. At Party Plan Checklist™, we use one shared master list, then tailor it to the event. A birthday party needs a different level of vendor paperwork than a campus conference, but both need a date, a budget, a guest plan, and someone responsible for the cleanup.
For the broader planning sequence, see our 🚀 Beyond 7 Steps: The 10-Step Event Mastery Guide (2026).
| Quick fact | What it means for your plan |
|---|---|
| A checklist tracks tasks, owners, deadlines, and status | “Book a cater” is more useful with a name, due date, and confirmation status attached. |
| Some checklist items will not apply | Mark them N/A rather than leaving ambiguous blank boxes. |
| The guest count affects many other decisions | Attendance influences venue capacity, catering, seating, supplies, and staffing. |
| Risk planning belongs in the checklist | Weather, accessibility, first aid, venue rules, and emergency contacts are logistics—not gloomy decorations. |
| Event-day paperwork should be easy to find | Keep the final schedule, contact list, floor plan, and vendor details together. |
Five fast rules from our planning team
- Assign one owner to every task. A task with two owners often has none.
- Work backward from fixed deadlines. Venue access, cater guarantees, print production, and speaker travel all have lead times.
- Track decisions as well as to-dos. Record what was approved, by whom, and when.
- Build a contingency plan for the risks that matter most. Outdoor event? Decide who calls the rain plan, by what time, and how guests hear about the change.
- Leave room for real life. A buffer in the schedule can absorb late arrivals, a slow check-in line, or a microphone that chooses the exact wrong moment to retire.
A helpful checklist can be a spreadsheet, a shared document, or event management software. The best format is the one your team will actually update.
🗓️ What Is an Event Planning Checklist?
An event planning checklist is a structured list of tasks used to plan, coordinate, deliver, and evaluate an event. It turns a large, slightly intimidating project into smaller actions with deadlines, owners, and completion notes.
A checklist is not the same as a calendar or event schedule:
| Planning tool | Main purpose | Example | ||
|---|---|---|---|---|
| Event planning checklist | Tracks work that must be completed | Confirm cater’s final guest-count deadline | ||
| Planning timeline | Shows when work should happen | Send invitations six weeks before the event Run of show | Gives the event-day program in sequence | 6:00 p.m. doors open; 6:30 p.m. welcome remarks |
| Budget tracker | Records expected and actual spending | Compare catering estimate with final invoice | ||
| Contact sheet | Makes key people reachable | Venue manager’s mobile number and arrival time |
The University of Texas at Dallas event checklist describes a checklist as a step-by-step guide for planning through completion. That’s a useful foundation. In practice, we recommend adding owners, deadlines, dependencies, costs, and status so the document answers not just what needs doing, but who is doing it, by when, and what could hold it up.
What a strong checklist includes
At minimum, include:
- Task: What needs to happen?
- Owner: Who is responsible?
- Deadline: When must it be complete?
- Status: Not started, in progress, complete, or blocked.
- Dependencies: What must happen first?
- Notes or evidence: Confirmation number, contract location, decision, or follow-up.
A blank checklist may look wonderfully peaceful. It can also conceal a missed rental order. Give every important task a status, and use N/A for work that does not apply.
📜 How Event Planning Checklists Keep Every Detail on Track
Planning is a chain of connected decisions. The venue affects the room layout; the layout affects sound and seating; the guest count affects catering and staffing. A checklist makes those connections visible before they become last-minute surprises.
The Georgia Tech event planning guide describes a checklist as a tool for keeping an event “on track and on budget.” We agree, with one practical addition: it should keep the team on the same page, too.
Benefits beyond remembering tasks
- Fewer dropped details: Owners and due dates make responsibility clear.
- Better budget control: Track commitments and actual expenses before invoices arrive.
- Smother teamwork: Vendors, volunteers, hosts, and venue partners can work from the same version.
- More reliable guest experience: Accessibility requests, parking instructions, and dietary needs are less likely to disappear into someone’s inbox.
- Useful learning after the event: Completed checklists show what took longer, what was missed, and what can be reused.
The checklist is a guide, not a stone tablet
A checklist should be adapted to the event. A small backyard birthday may not need a formal security walkthrough. A public outdoor festival may require permits, insurance, crowd-management planning, and local safety approvals. Use the checklist to prompt questions, then confirm requirements with the venue and relevant local authorities.
Our real-world lesson: the “tiny” detail that wasn’t
For a family celebration, we once had the big pieces handled early: venue, food, invitations, and music. Then we noticed that the venue’s loading entrance closed before our décor delivery window. Nothing was wrong with the event plan—except the boxes had nowhere to go. We added delivery access and arrival instructions to our venue checklist after that. The smallest logistics can make a surprisingly large entrance.
🎯 Choose the Right Checklist for Your Event
Start with one master checklist, then adjust it for the event’s format, audience, location, and level of risk. A checklist for a birthday party should be practical and guest-focused. A corporate event may also need approvals, speaker coordination, registration data, and post-event reporting.
| Event type | Extra planning priorities |
|---|---|
| Corporate event or conference | Objectives, registration, speakers, AV, branding, accessibility, reporting |
| Wedding or social celebration | Guest experience, ceremony or program timing, food, décor, family coordination |
| Fundraiser or community event | Permits, donations or ticketing, volunteers, crowd flow, weather plan |
| Virtual or hybrid gathering | Platform, connectivity, captions, remote-speaker rehearsal, digital engagement |
Corporate Events and Conferences
Add checklist items for:
- Approval and procurement requirements
- Speaker agreements, biographies, travel, and presentation deadlines
- Registration, check-in, name badges, and attendee communications
- AV, livestream, captions, microphones, and rehearsal
- Sponsor recognition, branding, and post-event reporting
For larger programs, have one person own the run of show and another manage speaker or vendor changes. That separation helps prevent a schedule edit from quietly becoming a microphone mystery.
Weddings, Parties, and Social Gatherings
Keep the focus on what guests will see and need:
- Guest list, invitations, RSVP tracking, and seating
- Food, beverages, dietary requests, and service timing
- Music, entertainment, décor, and photography
- Arrival instructions, parking, accessibility, and weather backup
- Setup, cleanup, borrowed items, gifts, and leftover food
For birthdays, our birthday party checklist can help you turn a big idea into manageable tasks. If you’re planning on a tighter budget, explore budget party planning.
Fundraisers, Community Events, and Festivals
Public-facing events may need additional approvals and coordination. Check with the venue and local authorities about:
- Permits, insurance, fire-safety requirements, and noise restrictions
- Crowd capacity, entrances, exits, and accessible routes
- Vendor load-in, power, waste, sanitation, and emergency access
- Volunteer briefings, donation handling, and guest communication
- Weather decisions and cancellation or postponement terms
Requirements vary by location and event type; do not assume another event’s permit or safety plan applies to yours.
Virtual and Hybrid Events
A virtual event is still an event—it simply moves some logistics onto a screen.
Add tasks for:
- Platform selection, registration, access links, and technical support
- Speaker briefing, camera and microphone checks, and rehearsals
- Captions and accessible digital materials
- Remote audience questions, moderation, and networking
- Backup host, alternate dial-in details, and recording permissions
✅ The Complete Event Planning Checklist: 20 Steps from Idea to Wrap-Up
Use these 20 steps as a master event planning checklist. Copy the ones that apply, mark the rest N/A, and add owners and deadlines. The featured video offers a complementary 10-point perspective: goals, budget, team, venue, program, catering, entertainment, invitations, teardown, and feedback. Our expanded list adds the operational details that keep those big-picture pieces connected.
1. Define the Event Purpose, Goals, and Success Measures
Write down why the event exists before choosing the napkin color.
- State the event’s purpose in one clear sentence.
- Set three to five measurable goals where practical.
- Choose a way to evaluate each goal.
- Identify who approves the event’s purpose and major decisions.
Possible measures include registrations, attendance, donations, participant feedback, qualified leads, or completion of a training objective. Pick measures that reflect your actual goals; a packed room is not automatically a successful event if the purpose was intimate networking.
2. Identify Your Audience and Estimate Attendance
Describe who the event is for and what they need to participate comfortably.
- Estimate invites, expected RSVPs, and likely attendance.
- Review past attendance patterns where available.
- Note VIPs, speakers, families, children, or other groups requiring specific arrangements.
- Decide what information to collect during registration.
- Consider privacy: collect only the guest details you need and explain how they will be used.
A headcount estimate is not a promise. Track confirmed, declined, and pending responses separately, then align the final count with venue and catering deadlines.
3. Set the Event Date, Time, and Planning Timeline
Check the date against the people and calendars that matter:
- Host, key speakers, venue, and essential vendors
- Public holidays, religious observances, school schedules, and major local events
- Setup and breakdown access windows
- Travel, parking, and transit patterns
- Weather season, if any event activity is outdoors
Then work backward from fixed deadlines: contract dates, invitation delivery, registration close, print production, and final catering count. Put these milestones in the calendar as well as the checklist.
4. Build an Event Budget and Track Expenses
List projected expenses before booking the extras. Typical categories include:
- Venue, rentals, utilities, and cleaning
- Food, beverages, service, and gratuities where applicable
- AV, lighting, staging, Wi-Fi, and technical labor
- Speakers, entertainment, travel, and accommodation
- Invitations, design, printing, signage, and décor
- Permits, insurance, security, accessibility services, and staffing
- Transportation, photography, supplies, and contingency funds
Track estimated cost, approved commitment, actual cost, payment deadline, and responsible person. Maintain a contingency allowance appropriate to your event’s uncertainty, rather than treating every remaining dollar as available for centerpieces.
For cost-conscious ideas, visit Budget Party Planning.
5. Select and Book an Accessible Venue
Compare venues using more than photographs and capacity. Our event venue selection guide can help you organize the decision.
Ask each venue:
- Does the room fit your expected attendance and planned layout?
- Are accessible entrances, routes, restrooms, and seating available?
- What AV, furniture, lighting, Wi-Fi, and staff are included?
- When can vendors load in, and when must everything be removed?
- What are the rules for food, alcohol, décor, signage, and outside vendors?
- What are the cancellation, rescheduling, and weather policies?
- Where are the parking, transit, loading, and emergency-access points?
Record the venue contact, contract requirements, access times, and approved floor plan.
6. Check Permits, Insurance, Contracts, and Event Rules
Requirements depend on the venue, event activities, and location. Ask early about:
- Permits or licenses for public space, street use, amplified sound, food service, or alcohol
- Certificates of insurance and contractual responsibilities
- Fire-safety or occupancy rules for tents, stages, and temporary installations
- Security requests, emergency procedures, and restricted areas
- Vendor approval, purchasing, and cancellation terms
For campus events, follow the institution’s own process. The Georgia Tech checklist, for example, includes institution-specific security and vendor coordination. Treat those as examples, not universal rules. Your venue and local authorities determine what applies to your event.
7. Create the Event Team, Roles, and Approval Process
List the people responsible for planning and event-day decisions.
| Role | Typical responsibility |
|---|---|
| Event lead | Overses the plan, budget, deadlines, and approvals |
| Venue lead | Coordinates access, floor plan, venue rules, and facilities |
| Vendor lead | Confirms contracts, arrival times, and service details |
| Guest lead | Manages invitations, RSVPs, accommodation requests, and check-in |
| Program lead | Owns speakers, entertainment, scripts, and run of show |
| Safety lead | Knows emergency procedures and relevant contacts |
| Event-day lead | Handles on-site decisions and escalation |
One person may hold multiple roles for a small gathering. The essential part is that every key responsibility has a named owner and everyone knows who can approve changes.
8. Choose Vendors and Coordinate Venue Partners
Build a vendor list based on the event’s needs: catering, AV, rentals, entertainment, photography, décor, security, transportation, and cleanup.
For each vendor, confirm:
- Scope of service and deliverables
- Arrival, setup, service, and departure times
- Venue access and load-in details
- Equipment, power, internet, and staffing requirements
- Payment schedule, cancellation terms, and insurance requirements
- Day-of contact and backup contact
Keep the latest agreements and confirmations together. If the venue requires approved or preferred vendors, ask before signing elsewhere.
9. Plan the Program, Run of Show, and Event Protocol
Build the program around guest flow, not just a list of speakers.
A run of show can include:
| Time | Activity | Owner | Notes |
|---|---|---|---|
| Before doors | Final setup and technical check | Event lead | Check signage, room, and microphones |
| Guest arrival | Check-in and welcome | Guest lead | Direct guests to seating and refreshments |
| Opening | Welcome and housekeeping | Host | Mention facilities and accessibility information |
| Main program | Speches, activities, or entertainment | Program lead | Include transitions and timing cues |
| Close | Final remarks and next steps | Host | Explain exits, transport, or follow-up |
| After guests leave | Breakdown and venue check | Event lead | Inventory supplies and report issues |
Add speaker order, introductions, pronunciation notes, AV cues, transitions, and what happens if a segment runs late. For formal events, confirm protocol with the host organization rather than guessing.
10. Book Speakers, Hosts, Performers, and Special Guests
Confirm the details in writing:
- Name, title, pronunciation, biography, and approved introduction
- Arrival time, travel, accommodation, and point of contact
- Speaking length, topic, format, and presentation deadline
- Microphone, stage access, accessibility, and technical needs
- Permission to photograph, record, or livestream
- Backup plan if someone is delayed or unable to attend
Send speakers the schedule and venue information in advance. On event day, give them one clear contact—not a scavenger hunt through the volunteer team.
11. Arrange Catering, Refreshments, and Dietary Needs
Confirm menu, service style, timing, equipment, and final guest-count deadline with the cater.
- Collect dietary requests through a clear RSVP question.
- Confirm how the cater will identify dishes and manage allergens.
- Ask about vegetarian, vegan, gluten-free, and other requested options.
- Plan water and nonalcoholic beverages.
- Confirm linens, serving utensils, cleanup, and leftover-food rules.
- Provide final counts by the cater’s stated deadline.
Never assume a dish is safe for a guest’s allergy based on its name. Share requirements with the cater and confirm their procedures directly.
12. Plan Event Design, Décor, Signage, and Branding
Design should help guests understand where they are and where to go—not merely make the room look like a carefully curated mood board.
- Choose a consistent theme, color palette, and branding approach.
- Confirm décor rules, wall attachments, open flames, and setup limits.
- Prepare directional, welcome, schedule, and accessibility signs.
- Check readability, color contrast, and placement.
- Confirm setup labor, rental return, and removal responsibilities.
- For branded or campus events, follow applicable brand and licensing rules.
Use reusable items when they suit the event and venue. A sign that can be used again is both practical and kinder to the cleanup crew.
13. Organize Audio-Visual Equipment and Event Technology
Write down what the event actually requires: microphones, speakers, projector, screen, lighting, presentation laptop, adapters, internet, recording, or livestream.
Then confirm:
- Who supplies and operates each item
- Where equipment will be positioned
- Whether speakers need confidence monitors or handheld microphones
- How questions will be taken from the audience
- Whether captions or interpretation must be integrated
- When the technical rehearsal will happen
- What backup exists if the network or equipment fails
A laptop adapter may be small enough to fit in a pocket and powerful enough to save a presentation. Keep the AV lead’s number on the event contact sheet.
14. Make the Event Accessible, Safe, and Inclusive
Ask what guests may need to participate, then plan those supports early. The ADA National Network’s guidance on temporary events is a useful starting point; consult your venue and qualified accessibility professionals for event-specific advice.
Checklist prompts:
- Accessible route, seating, restrooms, and registration area
- Accommodation request process and responsible contact
- Captions, ASL interpretation, or other communication supports
- Readable digital materials and signage
- Clear emergency exits and accessible evacuation procedures
- Staff and volunteer briefing on how to offer assistance respectfully
Do not wait for a guest to solve an access barrier after arriving. Ask, plan, and confirm.
15. Set Up Registration, Invitations, and Guest Communications
Plan the guest journey from invitation to arrival.
- Select the invitation or registration method.
- State date, time, location, access details, dress code if relevant, and RSVP deadline.
- Ask only for information needed to plan the event.
- Provide a way to request accommodations and share dietary needs.
- Send confirmation, reminders, and a final logistics message.
- Include parking, public transit, entry instructions, and a contact for questions.
For ticketed events, test the registration flow from a guest’s perspective. If guests need a password, an app, or a special entry code, explain it before event day.
16. Promote the Event and Manage Marketing
Match promotion to the audience and event purpose.
- Set the key message, audience, channels, and schedule.
- Prepare consistent event details for email, social media, posters, and web pages.
- Confirm image permissions and accessible content.
- Track registrations or responses so you can adjust outreach.
- Coordinate publicity with partners, sponsors, or the host organization.
- Update guests promptly if details change.
Promotion is not finished when the invitation goes out. Add a task to check registrations and decide whether a reminder or additional outreach is needed.
17. Order Supplies, Printed Materials, and Giveaways
Order only what the event needs, and allow time for delivery and corrections.
Common supplies include:
- Name badges, blank inserts, pens, and check-in lists
- Printed programs, menus, maps, and seating cards
- Directional signs, easels, tape, scissors, and markers
- Podium water, table supplies, and approved décor
- Giveaway items, speaker gifts, and volunteer materials
- First-aid supplies appropriate to the event and venue plan
Ask the venue what it already provides. Keep a supply inventory and label boxes by location or task. Confirm brand permissions before ordering branded giveaways.
18. Confirm Final Details and Prepare Contingency Plans
In the final weeks, reconfirm the moving parts:
- Venue access, layout, setup, and breakdown
- Vendor arrival windows, contacts, and service details
- Final RSVP count and catering deadline
- Speaker attendance, travel, presentation files, and scripts
- Volunteer roles, check-in process, and emergency contacts
- Weather decision owner, decision time, and guest notification method
- Backup plans for key equipment, suppliers, or program changes
Georgia Tech’s checklist also emphasizes items such as confirming final details, preparing volunteers, checking materials, and assembling an event-day survival kit. Those are broadly useful ideas; institution-specific purchasing, security, and approval rules are not automatically transferable to private or community events.
19. Manage Event-Day Setup, Check-In, and Troubleshooting
Arrive early enough to inspect the room before guests arrive.
- Meet the venue lead and confirm access.
- Walk the guest route from entrance to check-in, seating, restrooms, and exits.
- Check décor, furniture, signs, accessibility arrangements, and catering setup.
- Test microphones, presentation files, lighting, internet, and livestream if relevant.
- Brief volunteers and vendors on roles, schedule, contacts, and escalation.
- Keep the latest run of show and contact list accessible.
- Record changes so the team is working from the same information.
A simple event-day kit can include pens, tape, scissors, safety pins, spare badge inserts, chargers, and a printed contact sheet. The venue’s own safety and first-aid arrangements should guide any additional supplies.
20. Close Out, Evaluate Results, and Follow Up
The event is not finished when the last guest waves goodbye. Close the loop:
- Supervise breakdown and confirm the room is left as agreed.
- Return rentals and inventory reusable supplies.
- Record vendor issues, damaged items, and invoices still due.
- Send thank-you notes to speakers, volunteers, sponsors, and partners.
- Share approved photos, resources, or follow-up information.
- Collect attendee feedback and compare results with the original goals.
- Hold a short debrief while the details are fresh.
Ask three simple questions: What worked? What should change? What surprised us? That last one often supplies the most useful line in next year’s checklist.
⏳ Event Planning Timeline: What to Do and When
The right planning lead time depends on the event’s size, complexity, venue, and booking requirements. A small home gathering may come together quickly; a large conference or public festival may need much longer. Use this as a flexible framework, then work backward from your fixed deadlines.
| When | Focus |
|---|---|
| Six months or more | Goals, date options, budget, venue research, major vendors |
| Three to six months | Contracts, program, invitations, promotion, accessibility planning |
| One to three months | Registration, vendor coordination, supplies, staffing, program details |
| Two to four weeks | Confirmations, final logistics, guest communications, contingency plans |
| Final week | Reconfirm, print, pack, brief team, rehearse |
| Event day | Inspect, deliver, monitor, and close out |
| First week after | Thank, evaluate, reconcile, and document |
Six Months or More Before the Event
For complex events, begin with purpose, stakeholders, date options, and budget. Research venues and major vendors early, especially if you need a specific location, season, speaker, or equipment package.
Three to Six Months Before the Event
Confirm the venue and major suppliers, shape the program, and begin promotion or save-the-dates where appropriate. Start accommodation and accessibility planning early; some services require lead time.
One to Three Months Before the Event
Manage registration, finalize the program, collect speaker requirements, confirm catering, and assign event-day roles. Check whether the expected guest count is compatible with room layout and service plans.
Two to Four Weeks Before the Event
Reconfirm vendors and venue logistics. Finalize signage, menus, staffing, seating, and guest instructions. Check the cater’s final-count deadline and work backward to set your RSVP cutoff.
The Final Week and Day Before the Event
- Send the final guest email with arrival information.
- Confirm vendor and speaker arrival times.
- Print or download the latest run of show and contact sheet.
- Pack supplies by task or room location.
- Test presentations and prepare backups.
- Reconfirm the venue setup and weather decision plan.
Event Day
Follow the run of show, keep one decision-maker available, and record significant changes. Have a named person manage vendor questions so the host can focus on guests and program.
The First Week After the Event
Send thanks, process follow-up, review feedback, and reconcile documents and invoices. Capture lessons while they are still fresh—not three months later when everyone remembers only the great dessert.
💰 Event Budget Checklist: Costs, Tracking, and Contingencies
A useful event budget is more than a total at the top of a spreadsheet. It connects each expense to an owner, a due date, and an approval status.
| Budget field | What to record |
|---|---|
| Category | Venue, catering, AV, décor, staffing, transport, and so on |
| Estimate | Expected cost during planning |
| Approved amount | Spending authorized by the decision-maker |
| Comitted amount | Contracted ordered expenses |
| Actual amount | Final amount invoiced or paid |
| Payment deadline | When payment is due |
| Owner and notes | Contact, approval, and assumptions |
Practical budget steps
- Set the spending limit and identify who approves expenses.
- List essential costs first, then optional enhancements.
- Request written quotes for major services.
- Record taxes, delivery, setup, staffing, overtime, and service charges where applicable.
- Track commitments as soon as contracts are signed.
- Keep a contingency reserve suitable for your event’s likely risks.
- Compare actual spending with the plan after the event.
For practical ways to make your budget work harder, browse Budget Party Planning. The best saving is often an early decision: choosing a venue that already includes tables, chairs, or suitable AV can reduce rental coordination as well as expense.
📍 Venue Selection Checklist: Layout, Access, and Logistics
A venue can look perfect online and still be awkward in person. Visit if possible, or request a detailed walkthrough and floor plan.
Venue comparison questions
- Does the capacity work for your planned layout—not just maximum occupancy?
- Can guests find the entrance, registration, restrooms, and accessible routes?
- Are loading, parking, public transit, and vendor access practical?
- Are setup and breakdown times included in your booking?
- What furniture, AV, Wi-Fi, and staff are provided?
- Are outside catering, alcohol, decorations, or amplified sound allowed?
- What are the cancellation and weather procedures?
Use our Event Venue Selection resources to compare options. Ask the venue to confirm crucial details in writing, especially access hours, included equipment, and rules that affect vendor setup.
🛡️ Event Safety, Emergency Planning, and Risk Management
Every event should have a proportionate safety plan. The details differ between a living-room birthday and a public festival, but knowing whom to contact and how to respond is useful at any scale.
Include:
- Venue emergency procedures and emergency contact information
- Clear exits and unobstructed routes
- A plan for severe weather, power loss, medical concerns, or cancellation
- Security arrangements where appropriate
- Vendor and volunteer reporting procedures
- An identified person authorized to make urgent decisions
The Federal Emergency Management Agency’s preparedness resources can help with general emergency planning. Confirm event-specific rules with the venue and local authorities; this checklist is not a substitute for legal, fire-safety, or professional risk advice.
♿ Accessibility and Inclusive Event Planning
Inclusive planning starts before registration opens. The ADA National Network’s temporary-events guidance offers practical information on accessibility considerations for events.
Ask the venue about:
- Accessible entrances, routes, seating, restrooms, and parking
- Communication access, including captions or interpretation where needed
- Accessible registration and digital materials
- Clear accommodation request instructions
- How staff will respond to requests and provide assistance
Use plain language, legible signs, and a communication channel guests can actually use. For a campus event, consult the institution’s accessibility office or equivalent service for local procedures.
🌿 Sustainable Event Planning and Waste Reduction
A thoughtful event can reduce waste without making guests feel as if they have wandered into a lecture about napkins.
- Estimate attendance carefully to avoid ordering far beyond need.
- Ask venues about recycling, composting, and reusable serviceware.
- Choose digital materials when they are practical and accessible.
- Use décor and signage that can be reused.
- Confirm how vendors handle packaging, leftovers, and waste.
- Make public transit, walking, or carpool information easy to find where relevant.
The U.S. Environmental Protection Agency’s sustainable materials resources provide broader waste-reduction guidance. For event-specific decisions, ask what the venue and vendors can actually support.
📱 Virtual and Hybrid Event Technology Checklist
For online or hybrid events, test the attendee experience—not only the host’s screen.
| Need | Checklist prompt |
|---|---|
| Registration | Do guests receive the correct link and joining instructions? |
| Platform | Does it support your audience size, program, and accessibility needs? |
| Speakers | Have presenters tested audio, video, slides, and screen sharing? |
| Moderation | Who watches chat, handles questions, and assists participants? |
| Accessibility | Are captions, accessible materials, and clear instructions arranged? |
| Backup | Is there an alternate host, contact method, or joining route? |
| Recording | Are consent, permissions, storage, and distribution handled? |
Schedule a rehearsal with remote speakers and the technical host. Test any livestream or captions in the actual event setup when possible. A confident “we tested it” means the full route was tested—not merely that someone opened the meeting room.
🧰 Event-Day Essentials: Documents, Supplies, and Backup Plans
Keep essential information together in a printed or offline-accessible event folder.
Event-day documents
- Final run of show
- Venue floor plan and setup instructions
- Vendor and staff contact sheet
- Guest or check-in list, handled securely
- Emergency procedures and decision contacts
- Speaker introductions, scripts, and pronunciation notes
- Latest delivery, parking, and access instructions
Useful basic supplies
- Pens, markers, tape, scissors, and spare paper
- Name badges and blank inserts
- Phone chargers and approved device adapters
- Printed signs or backup copies of key materials
- A small repair kit suited to the venue and event
Assign someone to carry and manage the kit. If everyone assumes “someone else has the tape,” tape becomes the event’s most elusive VIP.
📊 After the Event: Feedback, Reporting, and Vendor Closeout
A short debrief turns experience into a better next event.
Closeout checklist
- Thank speakers, vendors, volunteers, sponsors, and guests as appropriate.
- Confirm invoices, returns, damaged items, and venue closeout.
- Gather attendance and feedback data.
- Compare outcomes with the original event goals.
- Record what worked, what did not, and what should change.
- Save reusable schedules, contact details, and templates securely.
- If the event recurs, note booking dates and decisions for the next cycle.
Ask focused questions in your feedback survey. “What did you think?” is broad; “Was check-in easy?” gives you something you can act on.
💡 Quick Event Planning Tips and Common Mistakes to Avoid
Planning tips that save trouble later
- Keep one source of truth. Use a shared, up-to-date checklist rather than several competing copies.
- Make deadlines visible. Put fixed vendor and venue deadlines on the calendar.
- Confirm in writing. Verbal plans are easy to misremember during a busy week.
- Use a final walkthrough. Check guest flow, accessibility, signs, and setup before doors open.
- Plan for change. Identify which decisions can be adjusted and who approves them.
Common checklist mistakes
❌ Making a task list with no owners. Assign one accountable person to each task.
❌ Treating all events alike. Adapt the master checklist to the venue, audience, and risk level.
❌ Forgetting teardown. Include cleanup, rentals, leftover food, and venue handover.
❌ Leaving accessibility until the last minute. Ask early and confirm arrangements.
❌ Relying on memory for event-day changes. Update the current run of show and tell the relevant people.
❌ Overloading guests with registration questions. Collect only information you need to deliver the event.
❌ Assuming a blank box means complete. Use a clear status such as complete, blocked, or N/A.
For tools to organize larger teams, see Event Management Software. For a small gathering, a shared spreadsheet may be all the technology you need—especially if everyone agrees to update the same one.